Photoshop Line Art So You Dont Go Outside the Lines

How to use Free Transform in Photoshop

Learn how to calibration, rotate, flip, skew and distort images using the Free Transform command in Photoshop! Now fully updated for Photoshop CC 2020!
In this tutorial, I evidence you how to use Photoshop's Free Transform control to scale, rotate, flip, skew and distort images. You'll learn tips for getting the most out of Free Transform, and how to transform images without losing quality.
We'll start with the basics and learn how to scale and rotate images. And then nosotros'll await at Photoshop'due south more advanced transformations, like Skew, Distort and Perspective, along with the best ways to employ them. And at the end, I'll show you lot how to get more impressive results from the standard Rotate and Flip commands, including how to create a iv-way mirror image effect!
This tutorial includes changes Adobe fabricated to Complimentary Transform as of Photoshop CC 2019, along with additional improvements in Photoshop CC 2020. So for best results, you'll desire to be using the latest version of Photoshop. If you've been using Photoshop for a while and just need to catch up on the most recent changes to Gratuitous Transform, bank check out my New Features and Changes tutorial.
Let's get started!
The document setup
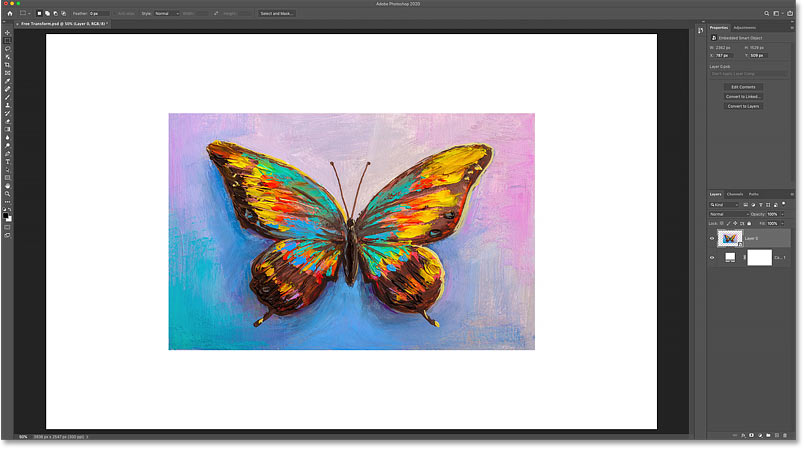
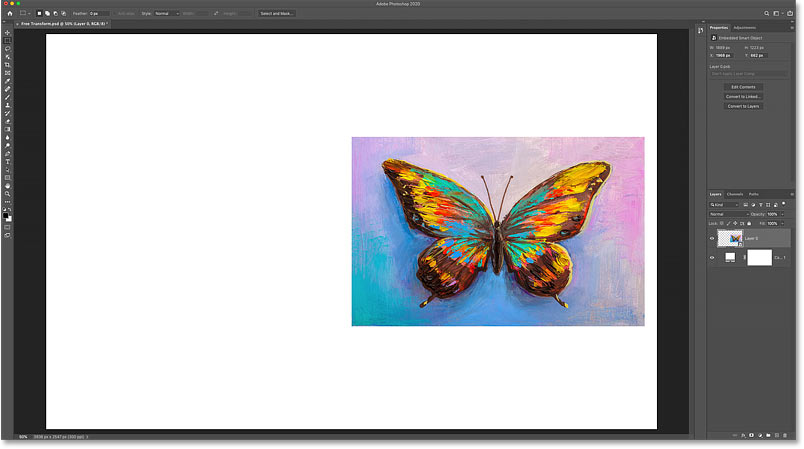
To follow along, get alee and open any epitome. I'll apply this image from Adobe Stock:

The original paradigm. Credit: Adobe Stock.
In the Layers panel, the paradigm appears on the Background layer:
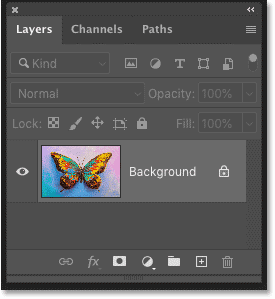
The Layers panel showing the paradigm on the Background layer.
Which types of layers can we transform in Photoshop?
Photoshop lets us transform virtually any blazon of layer, including pixel layers, type layers, shape layers, and fifty-fifty smart objects.
But one layer we can't transform is the Background layer, and that's because the Groundwork layer is locked:
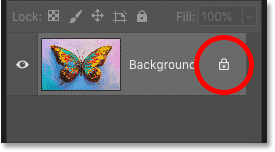
The Groundwork layer's lock icon.
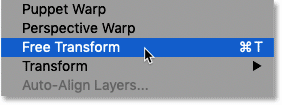
The Free Transform command is found nether the Edit menu in the Menu Bar. But with the Groundwork layer locked, the control is grayed out:
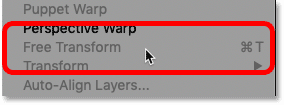
Complimentary Transform is not available.
How to unlock the Background layer
To ready that, simply unlock the Groundwork layer past clicking the lock icon:
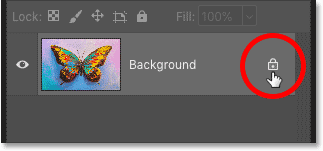
Clicking the lock icon.
And so go support to the Edit menu and you'll encounter Gratuitous Transform ready to be selected:
Gratuitous Transform is now available.
How to avoid transparency when transforming a layer
The only problem at present is that if I select Free Transform, then I scale my image smaller by clicking and dragging one of the handles, I end upwards with a checkerboard pattern behind the image. The checkerboard pattern is how Photoshop represents transparency:
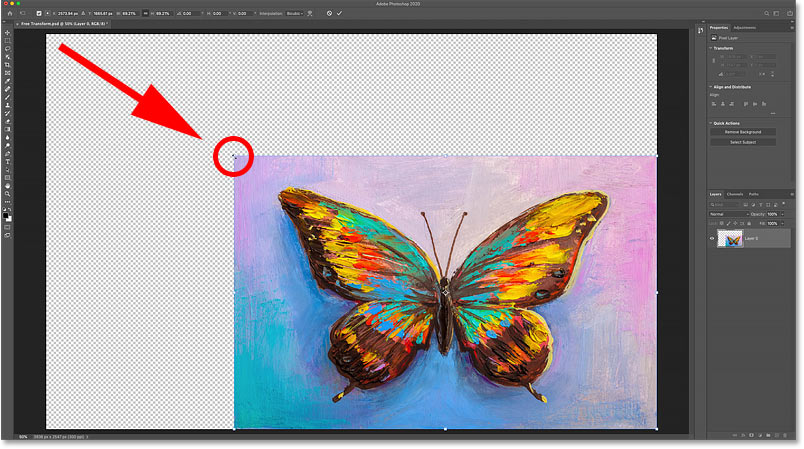
Scaling the epitome smaller fills the empty canvas space with transparency.
And the reason nosotros're seeing transparency is considering I currently have no other layers below my image:

The document contains a single layer.
Calculation a new layer beneath the image
So to ready that, I'll add a new layer. And my favorite blazon of layer to utilise for a background is a Solid color fill layer.
First, I'll press the Esc cardinal on my keyboard to cancel the Free Transform command without saving my changes. So I'll click the New Make full or Adjustment Layer icon at the bottom of the Layers panel:
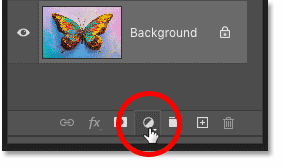
Clicking the New Fill or Adjustment Layer icon.
And I'll choose Solid Color from the list:
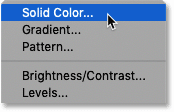
Adding a Solid Color fill up layer.
The great affair nigh a Solid Color fill layer is that it's like shooting fish in a barrel to cull any color you lot need from the Colour Picker. For this tutorial, I'll keep things elementary and choose white for my background, and and then I'll click OK to close the Color Picker:
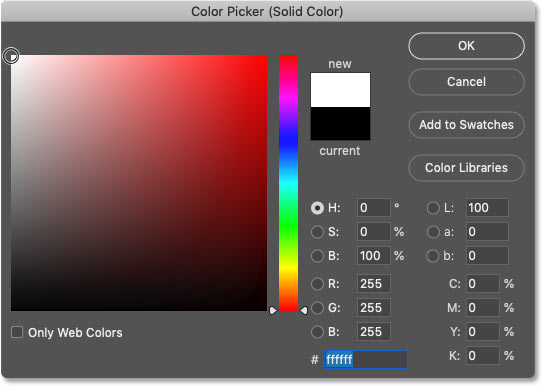
Choosing white from the Color Picker.
Then back in the Layers panel, I'll elevate the Solid Color fill up layer below the image:
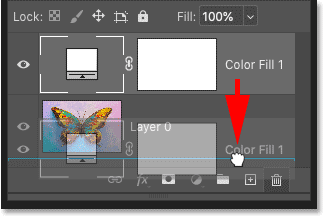
Dragging the fill layer beneath the image.
I'll click on the image layer to select information technology:
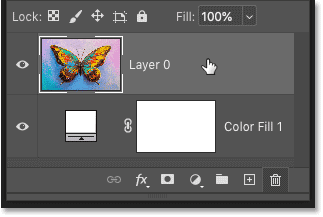
Selecting the image layer.
And this time, if I select Complimentary Transform from the Edit menu, and and so I drag a handle to scale the prototype smaller, we run across the white background backside the image instead of transparency. Over again, I'll printing the Esc key on my keyboard to cancel my changes:
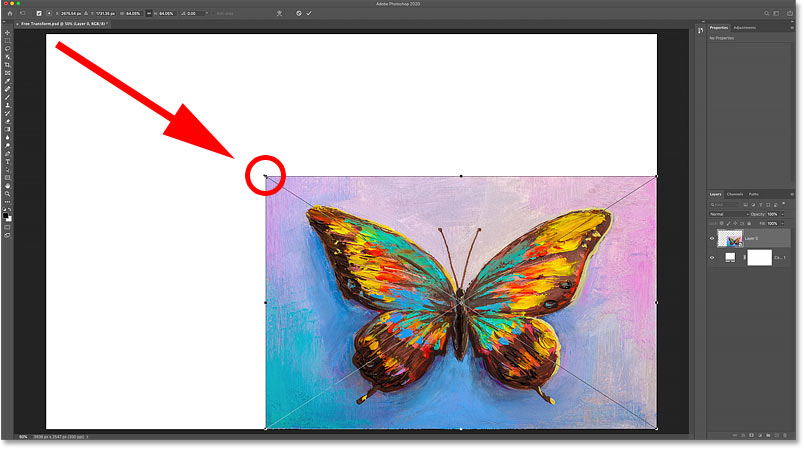
Scaling the image smaller reveals the Solid Colour fill layer behind it.
How to transform images without losing quality
Before we look at all the means to transform images in Photoshop, in that location's i more important topic we demand to encompass, and that's the deviation between subversive and non-destructive transformations.
Each time we calibration, rotate, or in some way transform a pixel-based layer, nosotros lose image quality. That's considering Photoshop needs to redraw the pixels every fourth dimension. This is known equally a destructive edit because nosotros're making permanent changes to the paradigm.
To avert losing quality, a improve way to piece of work is to first catechumen your layer into a smart object. Smart objects are similar containers that protect the image within them. Any transformations we make to a smart object are practical to the smart object itself, while the epitome inside information technology remains unharmed. And each fourth dimension we utilize a new transformation, Photoshop redraws the smart object based on that original image data. So no matter how many transformations we apply to a smart object, the result always looks smashing.
You can larn more than almost smart objects in my Resizing Images Without Losing Quality tutorial.
How to catechumen a layer to a smart object
To convert your layer into a smart object, right-click (Win) / Command-click (Mac) on the layer in the Layers panel:
Correct-clicking (Win) / Control-clicking (Mac) on the layer.
And and so choose Convert to Smart Object from the menu:
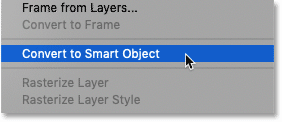
Choosing "Convert to Smart Object".
A smart object icon appears in the lower right of the preview thumbnail, telling us that the layer is now within a smart object, and we're set up to start transforming the epitome:
A smart object icon appears.
Which Transform options are available in Photoshop?
All of Photoshop's Transform options can exist accessed by going up to the Edit card and choosing Transform:
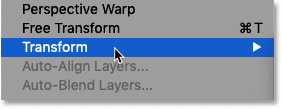
Going to Edit > Transform.
From hither, we tin can choose to Scale or Rotate the image, Skew it, perform Distort and Perspective transformations, and even Warp the image. I cover how to warp images in a separate tutorial.
We also accept standard options for rotating the paradigm xc or 180 degrees. And we can flip the image either horizontally or vertically:
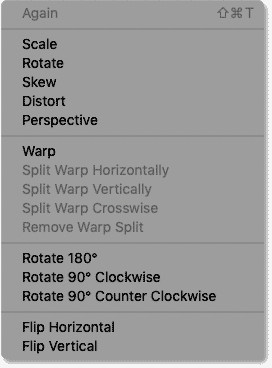
Photoshop's Transform options.
What is Free Transform?
Simply while you lot tin can proceed coming back to the Edit menu to select these dissimilar options, there'due south really no bespeak. That'south considering all of Photoshop's Transform commands can be selected using a single control known as Free Transform, a one-end-shop for all your image transformation needs.
You can select Costless Transform from here in the Edit menu. Merely a faster style is to utilize the keyboard shortcut, Ctrl+T (Win) / Command+T (Mac). Even if yous don't like keyboard shortcuts, this one is definitely worth knowing:
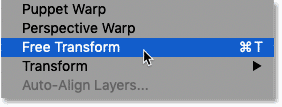
Going to Edit > Free Transform.
The transform box and handles
As shortly equally you select Free Transform, you'll see the transform box and handles around the image. There's a handle on the elevation, bottom, left and correct, plus one in each corner:
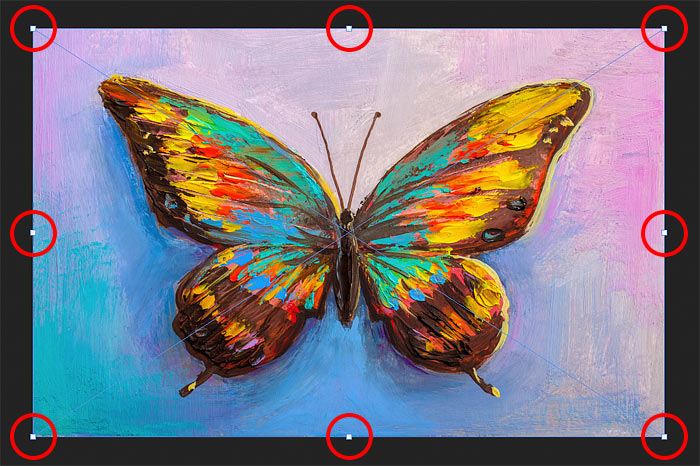
The Free Transform box and handles.
How to modify the color of the transform box
If the color of the transform box outline is hard to see in front of your image, you tin cull a different color.
Showtime, press the Esc central on your keyboard to abolish the Gratuitous Transform command . Then open Photoshop'south Preferences. On a Windows PC, go upward to the Edit bill of fare. On a Mac, go upwards to the Photoshop CC menu. From in that location, choose Preferences, and then Guides, Filigree & Slices:
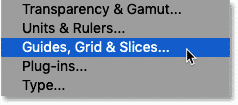
Opening the Guides, Grid & Slices Preferences.
Downwards at the lesser of the dialog box is the Control Color choice. This is the current color of the transform box:
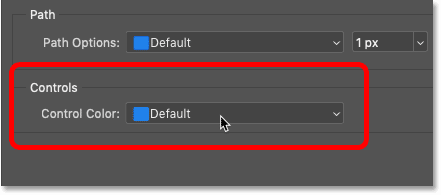
The Control Colour option.
The default color is a light blue, but you can click on the option and choose a different color from the list. The Classic option is a great choice because it displays a dark outline over light areas of the image and a low-cal outline over nighttime areas, making it very easy to run into.
One time you've chosen a colour, click OK to close the Preferences dialog box. And the next time you open Gratis Transform, you'll see the new colour:

The various color choices for the Complimentary Transform box.
How to scale an image with Free Transform
Let's look at all the ways we can transform images using Photoshop's Free Transform command, starting with Scale.
Scaling an image proportionally
To scale an image, click and drag any of the handles. As of Photoshop CC 2019, the default beliefs of Free Transform is to scale images proportionally. So no matter which handle you lot drag, you'll scale the image with the aspect ratio locked in place.
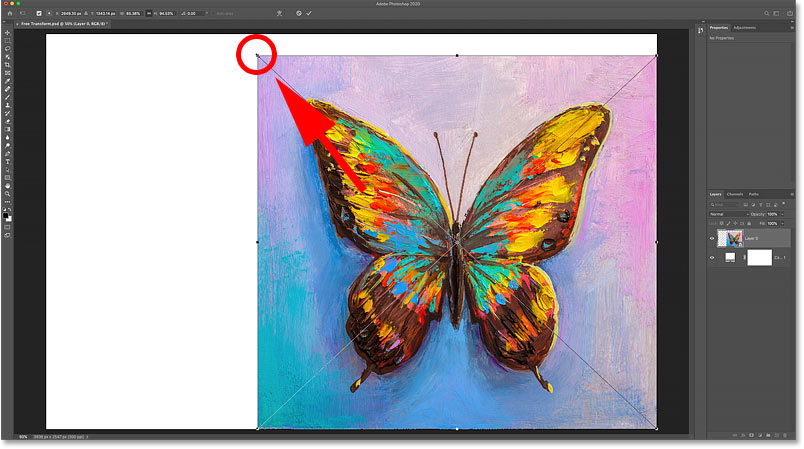
Here I'm dragging the top left corner handle inward:
Dragging a handle to scale the epitome proportionally.
Scaling non-proportionally
To calibration non-proportionally, hold your Shift central as you elevate a handle.
Here I'one thousand squishing the image past belongings Shift while dragging the left side handle inward:
Holding Shift while dragging a handle to scale non-proportionally.
To switch back to scaling proportionally, release your Shift key and so drag a handle.
But discover that Photoshop does not restore the original aspect ratio of the prototype. Instead, nosotros're locked into the new attribute ratio that nosotros created later scaling non-proportionally:
Photoshop does non restore the original aspect ratio automatically.
How to undo steps while in Gratis Transform
New as of Photoshop CC 2020, we tin now undo multiple steps while in Free Transform. Then if you need to get dorsum to the original aspect ratio, or to another previous footstep, get upward to the Edit menu and choose Undo. Or press Ctrl+Z (Win) / Command+Z (Mac) on your keyboard. Printing the shortcut repeatedly to undo every bit many steps as needed.
To redo a step, press Shift+Ctrl+Z (Win) / Shift+Command+Z (Mac). Press repeatedly to redo multiple steps:

Going to Edit > Undo.
And after undoing a couple of steps, I'm back to the original aspect ratio:
The original attribute ratio is restored.
Photoshop CC 2020 Update: Scaling shape layers
Back in Photoshop CC 2019, Gratis Transform behaved differently with shape layers than information technology did with pixel or blazon layers. Dragging a handle without holding Shift would calibration the shape layer non-proportionally. And holding Shift would scale information technology proportionally.
Thankfully, this issue has been fixed as of Photoshop CC 2020. Pixel layers, type layers and shape layers now behave the same way. Drag a handle without holding Shift to calibration proportionally, or hold Shift to scale non-proportionally.
How to move the image with Free Transform
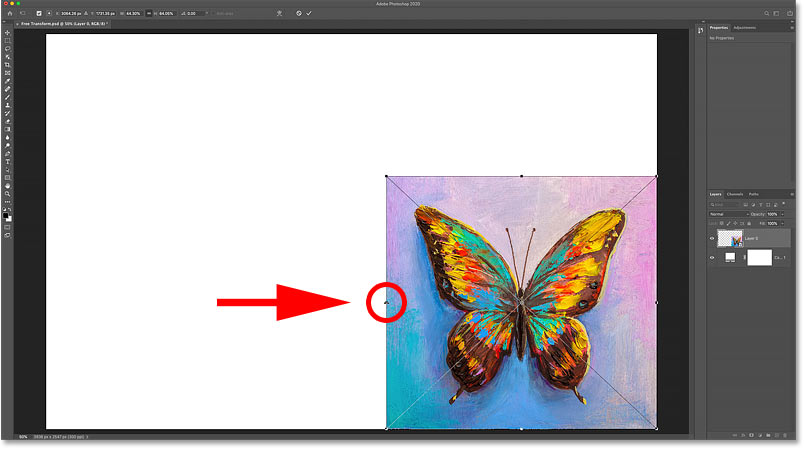
To move the image effectually inside the canvas while transforming it, click and elevate inside the Free Transform box:
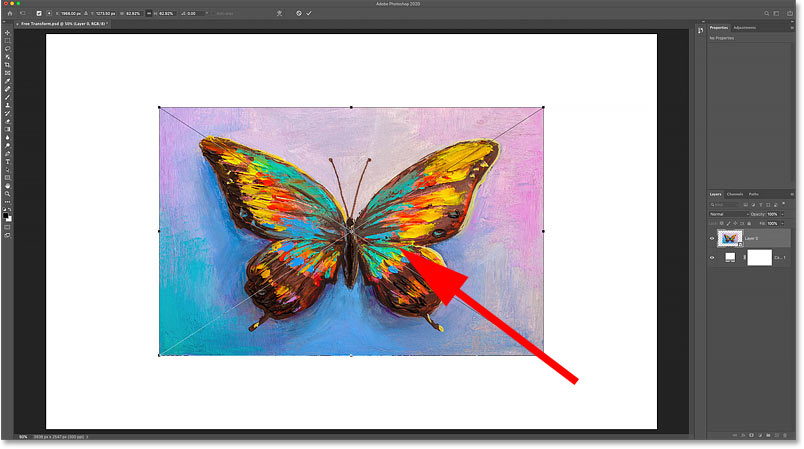
Dragging the image back into the center of the canvass.
How to scale an image from its center
To scale an epitome proportionally from its center, press and hold your Alt (Win) / Option (Mac) key every bit y'all elevate a handle.
Or to calibration non-proportionally from the center, agree Shift+Alt (Win) / Shift+Pick (Mac) as you drag:
Holding Alt (Win) / Option (Mac) to calibration from the center of the paradigm.
Related: How to restore the archetype Complimentary Transform behavior in Photoshop
How to accept the transformation
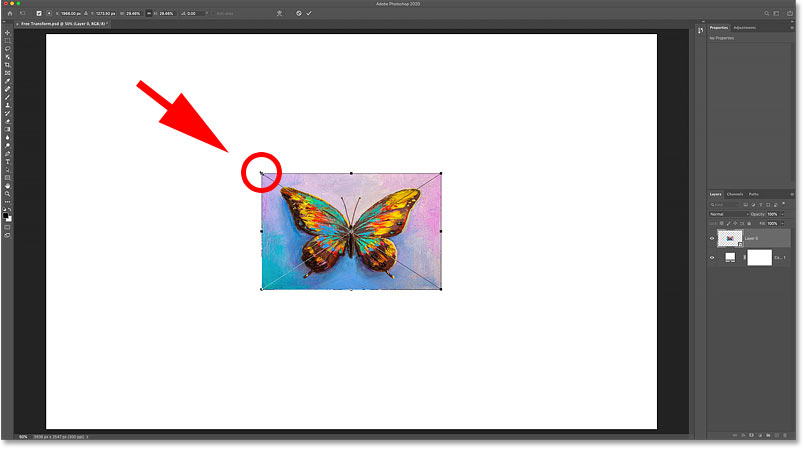
I'll scale my prototype to the size I need:
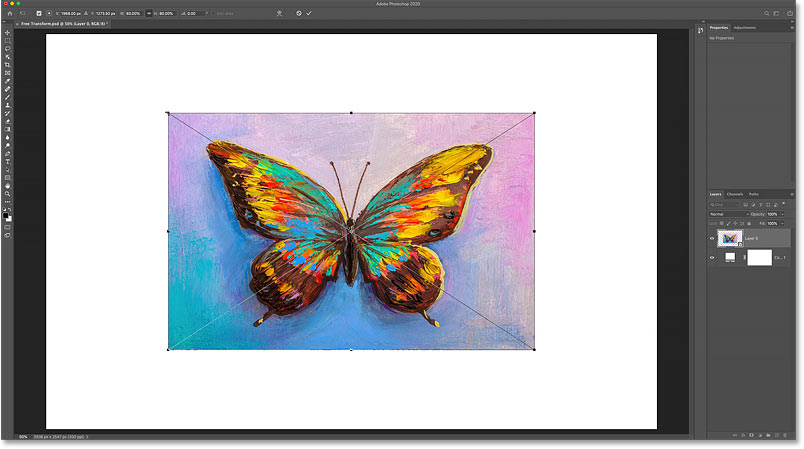
Scaling the image to the new size.
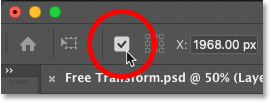
And then, if you're happy with the size of the image and yous have no other Transform commands to use, you can accept your changes and close Gratuitous Transform by clicking the checkmark in the Options Bar. Or press Enter (Win) / Render (Mac) on your keyboard:

Clicking the checkmark in the Options Bar.
How to restore the original image size
If y'all converted your image to a smart object as I showed you how to do earlier, and so it'south easy to restore the original size of your epitome even later you've scaled it and closed Free Transform.
Outset, press Ctrl+T (Win) / Command+T (Mac) to re-select the Free Transform control. Then, notice in the Options Bar that the Width and Height fields are both showing values less than 100%. In my case, I'1000 seeing a value of 60% for both the Width and the Height:
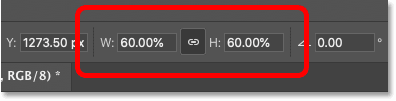
The current Width and Height of the scaled image.
Because we're working with a smart object, Photoshop knows that the original epitome inside the smart object is larger than the scaled size. To restore the original size, first brand sure the link icon between the Width and Height fields is selected:
Make certain the Width and Peak values are linked.
So simply change the Width or Height value to 100%. The other value volition modify forth with it. Press Enter (Win) / Return (Mac) to accept the new size:
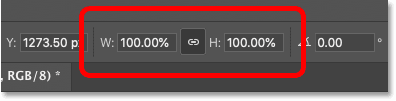
Manually setting the Width and Top back to 100%.
And now the prototype is back to its original size, and with no loss in quality:
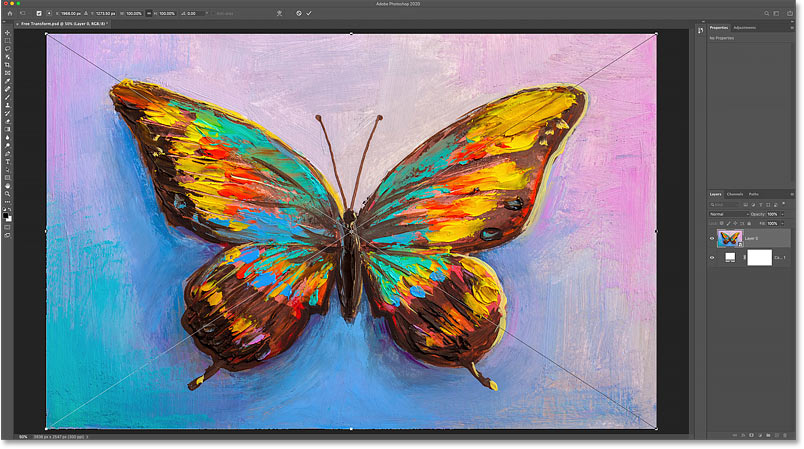
The original epitome size has been restored.
How to cancel Free Transform without saving your changes
That'south not actually what I wanted to do, so to cancel Free Transform without saving your changes, click the Cancel push button in the Options Bar. Or press the Esc key on your keyboard:

Clicking the Abolish button in the Options Bar.
And now I'm back to the scaled size:
Canceling Free Transform restored the scaled version.
How to rotate an image with Gratis Transform
To rotate an prototype, motion your mouse cursor outside the Free Transform box. Your cursor will change into a curved, double-sided arrow:
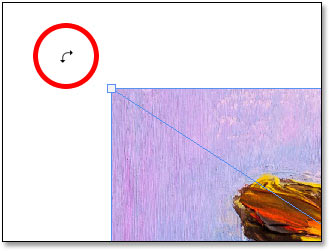
The rotate cursor.
Then click and drag to rotate the epitome freely. Or hold Shift as y'all drag to constrain the bending of the rotation to increments of xv degrees:

Click and drag outside the prototype to rotate it.
Inbound a specific rotation angle
Instead of dragging your mouse to rotate the image, you can also enter a rotation value straight into the Angle option in the Options Bar:
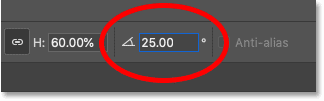
Entering a rotation bending manually in the Options Bar.
How to reset the rotation bending
And to reset the angle at any fourth dimension, just enter 0:
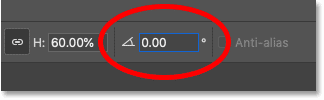
Enter 0 to reset the angle of the paradigm.
The transformation Reference Point
In earlier versions of Photoshop, the Costless Transform box included a target icon in the eye. The target icon is known every bit the Reference Signal because it marks the centre of the transformation. We'll expect at what that means in a moment.
But for whatever reason, Adobe decided to hide the Reference Point in the most recent versions of Photoshop. It'due south however in that location, simply we tin't see it unless nosotros turn it on.
How to prove the Reference Point
To plough the Reference Point on, go up to the Options Bar and click the Toggle Reference Point checkbox:
The Toggle Reference Point checkbox.
So look in the center of the Free Transform box and yous'll meet the target icon:
The Reference Point (target icon) in the center of the Free Transform box.
Moving the Reference Point
Earlier when we scaled the paradigm from its centre by holding Alt (Win) / Selection (Mac) and dragging a handle, what nosotros were really doing was scaling the image from the Reference Bespeak. And we can move the Reference Signal just by dragging the target icon to a dissimilar spot.
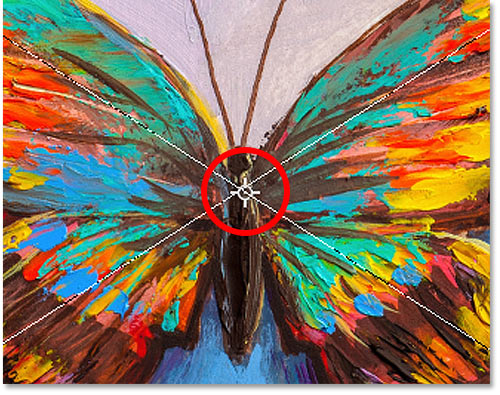
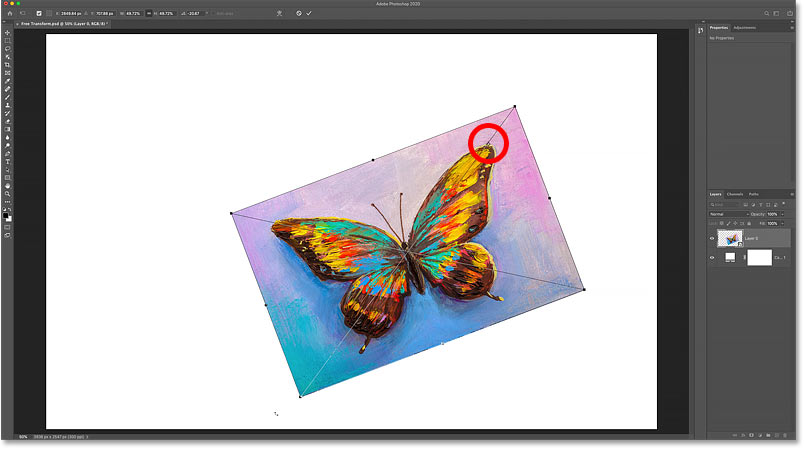
I'll move the Reference Betoken onto the tip of the butterfly's wing:
Dragging the target icon to motion the transform Reference Signal.
And now if I agree Alt (Win) / Option (Mac) and drag a handle, I'm scaling the prototype with the tip of the fly every bit the new heart indicate:
Scaling the image from the new Reference Signal.
And if I rotate the image, the image at present rotates effectually the wing:
Rotating the image around the new Reference Point.
Tip: A faster manner to move the Reference Point is to hold Alt (Win) / Option (Mac) and merely click on the spot where you want the target icon to appear.
The Reference Point Filigree
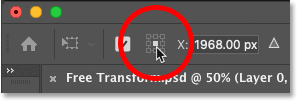
Another way to move the Reference Point is past using the Reference Betoken Grid in the Options Bar (directly beside the Toggle Reference Bespeak checkbox). Each outer foursquare in the filigree represents one of the handles around the transform box.
To move the Reference Betoken to a specific handle, click on its square in the grid. It'south pretty small, so yous may desire to go along a magnifying glass handy:

Using the Reference Betoken Grid to move the target icon to a handle.
How to center the Reference Point
And to move the Reference Point dorsum into the center of the transform box, click the center square in the grid:
Clicking the center foursquare to reset the target icon.
How to turn the Reference Indicate on permanently
If you desire to meet the Reference Point all the time without needing to click the Toggle Reference Indicate icon in the Options Bar, you lot can do that from Photoshop'south Preferences.
If Free Transform is active, press the Esc key to cancel information technology. And then press Ctrl+K (Win) / Command+Yard (Mac) to open the Preferences dialog box. Select the Tools category on the left, and then cull Show Reference Point when using Transform. Click OK to shut the dialog box:
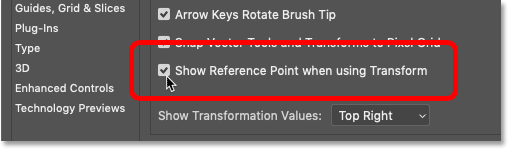
Turning the transform Reference Point on permanently in the Preferences.
How to access any transform command from Free Transform
So far, we've looked at how to scale and rotate an image with Free Transform. But what virtually Photoshop'southward other transform commands that nosotros saw nether the Edit carte du jour, like Skew, Distort and Perspective?
With Free Transform active, that same card of options can be accessed by right-clicking (Win) / Control-clicking (Mac) inside the Free Transform box. And then simply choose the one you lot need:
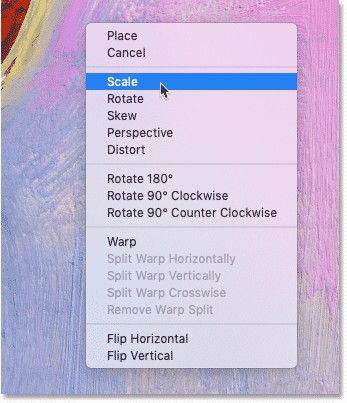
Free Transform lets you cull any Transform command whatsoever time.
How to skew an image
Permit's look at the next 3 commands in the list (Skew, Misconstrue and Perspective), starting with Skew. Select Skew from the carte:
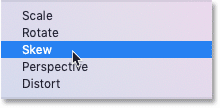
Selecting the Skew command.
With Skew selected, click on either the summit or bottom handle and elevate to skew the image left or right:
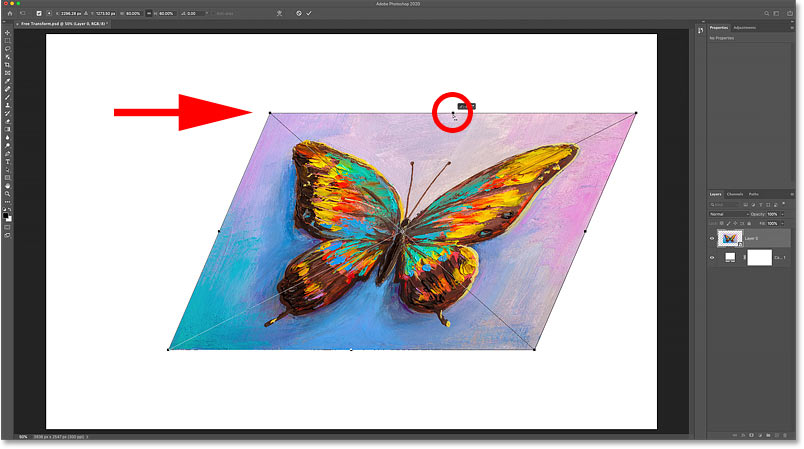
Drag the top or bottom handle to skew left or right.
I'll press Ctrl+Z (Win) / Control+Z (Mac) to undo that.
And to skew the image up or down, click and drag one of the side handles:
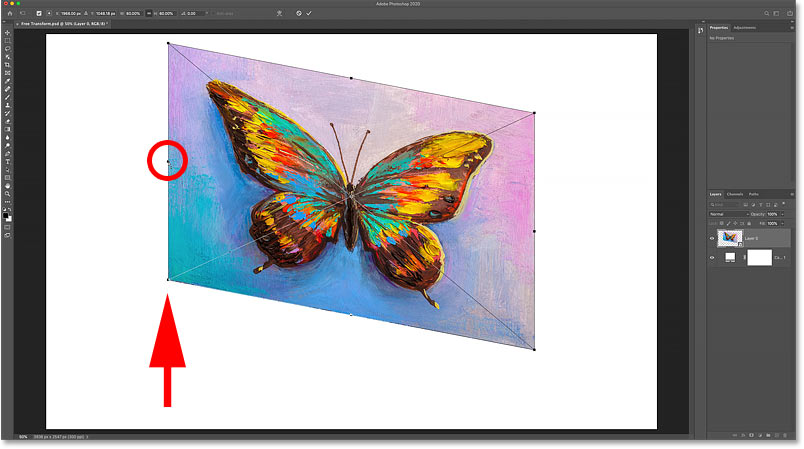
Drag a side handle to skew upwardly or down.
Again I'll undo that by pressing Ctrl+Z (Win) / Control+Z (Mac).
You lot can skew reverse sides at once (the top and bottom or the left and right) past property Alt (Win) / Option (Mac) as you elevate:
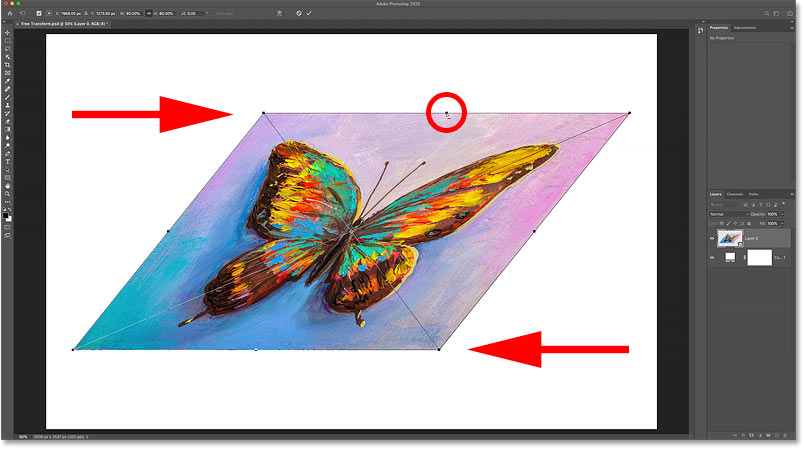
Belongings Alt (Win) / Option (Mac) to skew opposite sides at the aforementioned time.
How to distort an image
To distort an image, correct-click (Win) / Control-click (Mac) within the Costless Transform box and cull Distort:
Selecting the Distort command.
Then click and drag any of the corner handles. This is known as a four-point distortion because you're distorting the prototype from its iv corner points:
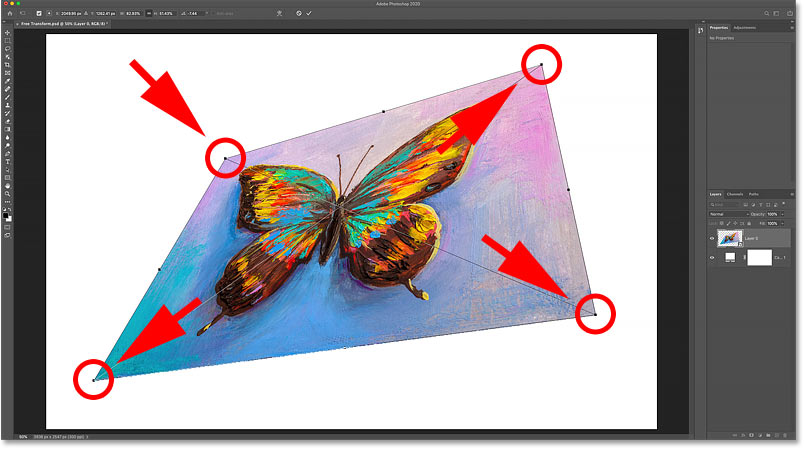
Elevate whatever of the corner handles to freely distort the paradigm.
How to disengage a distortion
Every bit I mentioned before, Photoshop CC 2020 now gives united states multiple undos while in Free Transform. So to undo a step in your distortion, press Ctrl+Z (Win) / Command+Z (Mac). Press repeatedly to undo multiple steps.
How to misconstrue an image in perspective
Along with performing a 4-point distortion, nosotros can as well perform a perspective distortion. Right-click (Win) / Control-click (Mac) inside the Costless Transform box and choose Perspective:
Selecting the Perspective command.
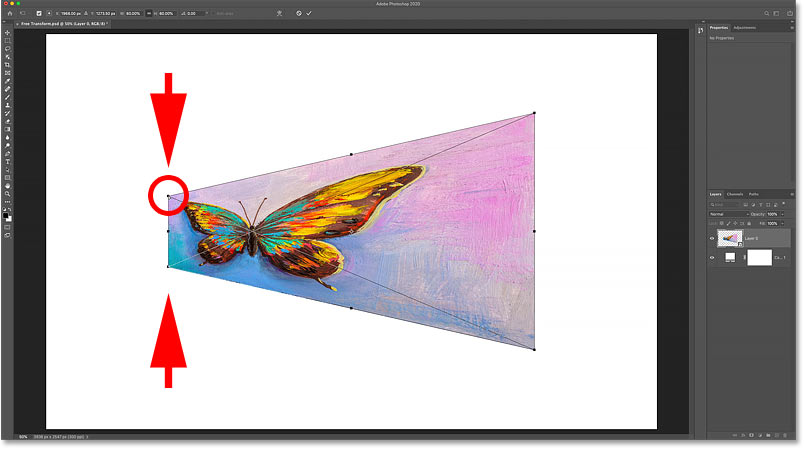
What's the difference between Misconstrue and Perspective?
The deviation between Distort and Perspective is that Distort lets us move each corner handle independently, only Perspective moves the opposite handle at the same time, in the opposite management.
Here I'm dragging the top left corner handle towards the right. And notice that the top right handle moves forth with it, but to the left:

In Perspective fashion, opposite corner handles motility together in opposite directions.
Or if I elevate a corner handle up or downward, the opposite handle again moves along with it. Perspective mode is great when y'all need to reshape an object to lucifer the perspective of the image, or to create unproblematic 3D effects:
Dragging a bottom corner handle upward moves the height corner handle down.
RelatedD: How to use Distort and Perspective with text in Photoshop!
The Skew, Distort and Perspective keyboard shortcuts
The problem with selecting transform commands from the bill of fare is that the commands are mucilaginous, meaning that yous can't do annihilation else unless you select a dissimilar control. For example, if you lot select Skew, and so you attempt to scale or rotate the image, you lot won't be able to. You would demand to starting time select Calibration or Rotate from the bill of fare, which can quickly become tedious.
A amend manner to select Skew, Distort or Perspective is to temporarily switch to them using their keyboard shortcuts. Once more, even if you don't similar keyboard shortcuts, these ones are worth knowing.
Skew
With Free Transform active, press and hold Ctrl (Win) / Command (Mac) on your keyboard to temporarily switch to Skew fashion. Then click and drag a top, bottom or side handle to skew the paradigm.
To constrain your movement to horizontal or vertical, hold Shift+Ctrl (Win) / Shift+Command (Mac) and elevate.
Add the Alt (Win) / Choice (Mac) cardinal to skew opposite sides at the same fourth dimension. And then release the fundamental(s) to leave Skew fashion and return to Free Transform.
Distort
To perform a four-signal baloney, hold Ctrl (Win) / Control (Mac) and drag any of the corner handles.
To constrain your motion to horizontal or vertical, add the Shift key. Release the key(s) to return to Free Transform.
Perspective
And to temporarily switch to Perspective way, concur Shift+Ctrl+Alt (Win) / Shift+Command+Option (Mac) and drag a corner handle. And so release the keys to return to Gratuitous Transform.
The Rotate and Flip commands
And finally, if you correct-click (Win) / Control-click (Mac) within the Gratuitous Transform box, yous'll find standard options for rotating the image 180°, rotating information technology 90° clockwise or counter clockwise, and for flipping the prototype horizontally or vertically:
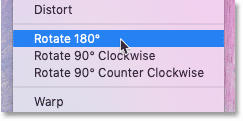
The Rotate and Flip transform commands.
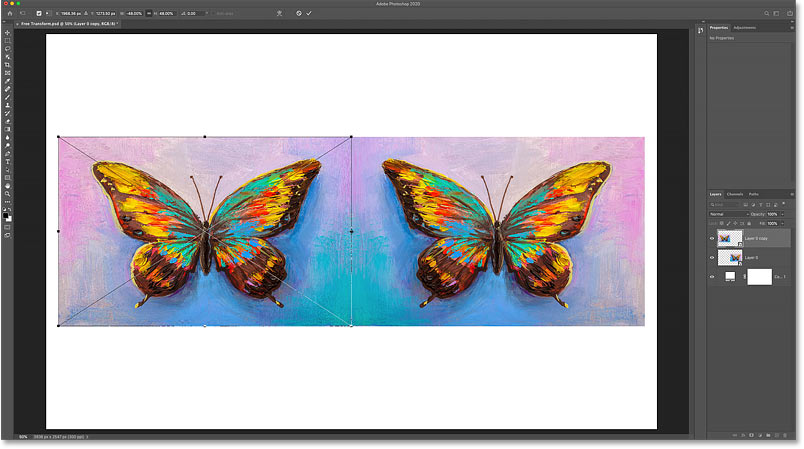
Create a four-fashion mirror image effect with Free Transform
On their ain, Photoshop's Rotate and Flip commands are pretty straightforward. But if we combine them with the transformation Reference Point (the target icon) that nosotros looked at before, we can do more than interesting things. For instance, permit's larn how to quickly create a four-way mirror prototype issue using the Costless Transform command.
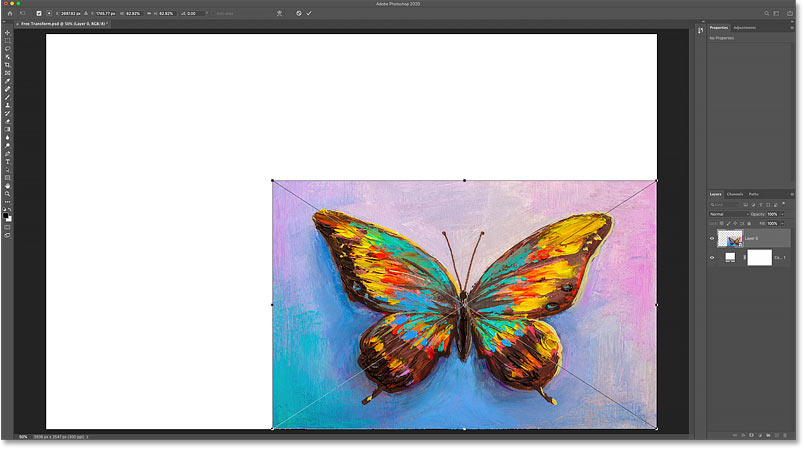
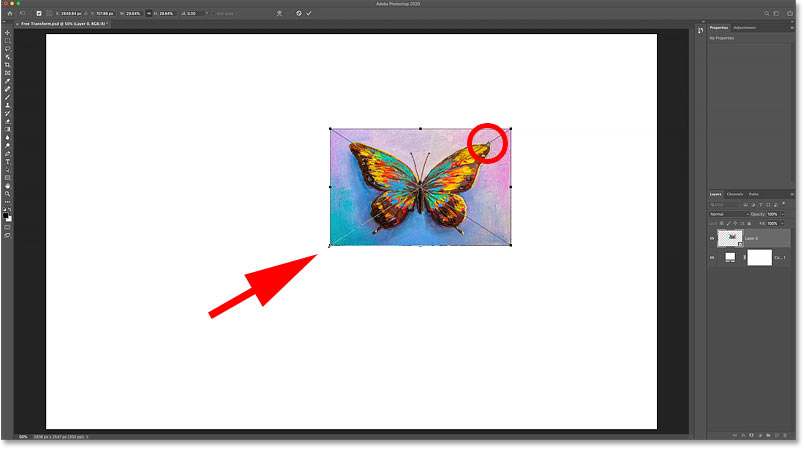
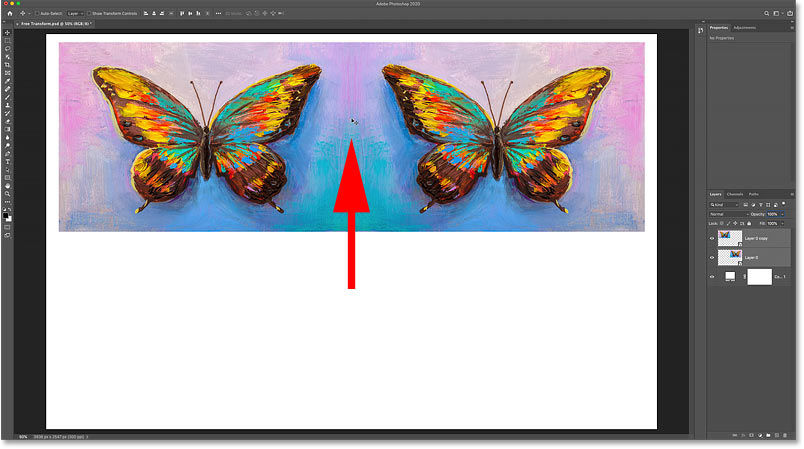
I'll scale my image a chip smaller, and I'll move it over to the correct side of the canvas. Then I'll press Enter (Win) / Return (Mac) to accept it and close Free Transform:
The image afterward scaling and moving information technology to the right.
Making a copy of the image
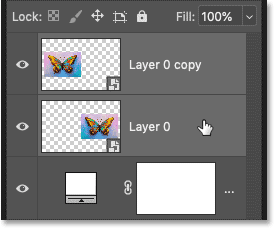
I'll brand a re-create of my layer (or in this case, my smart object) past pressing Ctrl+J (Win) / Command+J (Mac). And now in the Layers panel, nosotros come across two copies of the epitome.
I'll brand the sure the top smart object is selected:
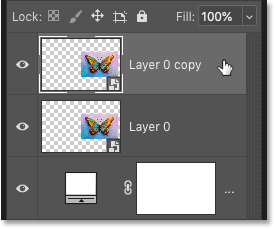
Selecting the copy of the smart object.
Moving the Reference Indicate
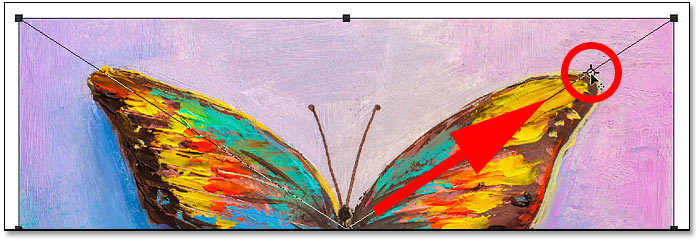
Then I'll press Ctrl+T (Win) / Command+T (Mac) to select Free Transform. Only before I select one of the transform commands, I'll click on the Reference Point in the center of the Free Transform box and I'll drag information technology over the left side handle:

Moving the Reference Betoken from the center to the side of the image.
Flipping the image horizontally
So I'll correct-click (Win) / Command-click (Mac) within the Free Transform box and I'll choose Flip Horizontal from the card:
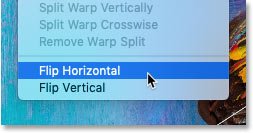
Choosing the Flip Horizontal control.
And considering I moved the Reference Signal over to the side, Photoshop flips the image using the left side as the center of the transformation, creating a mirrored version of the image. I'll press Enter (Win) / Return (Mac) to accept information technology:
Flipping horizontally from the side creates a mirror copy of the paradigm.
Moving the images
Dorsum in the Layers panel, I'll select both smart objects at in one case past property Shift and clicking the bottom smart object:
Selecting both smart objects.
Then I'll select Photoshop'south Motion Tool from the toolbar:
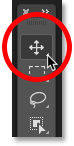
Selecting the Move Tool.
And in the Options Bar, I'll brand certain Automobile-Select is unchecked:
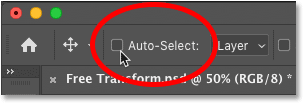
Automobile-Select should be turned off.
Then I'll drag both copies of the image into the upper half of the sheet. I'll agree Shift as I elevate to make it easier to drag straight up:
Using the Move Tool to move both images into the upper one-half of the canvass.
Making a copy of the two images
With both copies of the epitome still selected in the Layers console, I'll press Ctrl+J (Win) / Command+J (Mac) to re-create them:
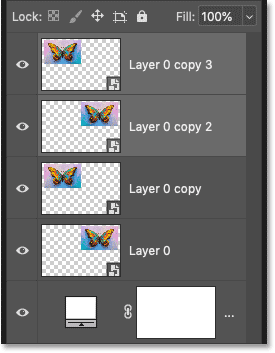
Pressing Ctrl+J (Win) / Control+J (Mac) to copy the smart objects.
Flipping the images vertically
And so dorsum in the document, I'll press Ctrl+T (Win) / Control+T (Mac) to select Gratis Transform. This places the Costless Transform handles around both images at one time.
I'll click on the Reference Point in the center, and this time, I'll drag it down onto the bottom handle. This fashion, the bottom of the images will get the center of the transformation:
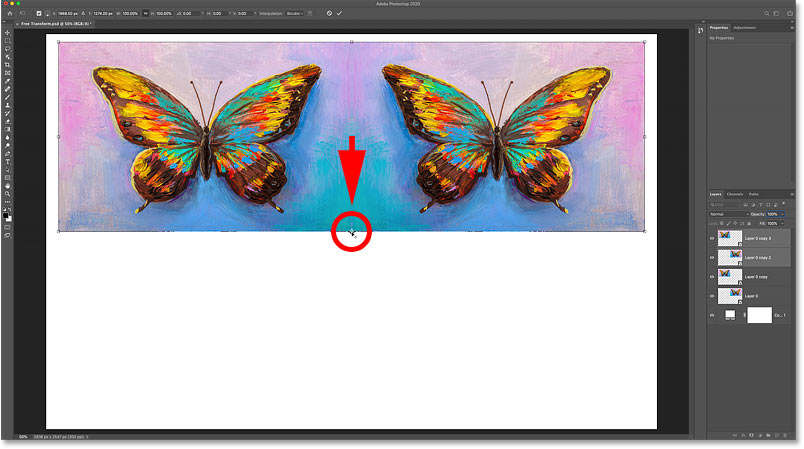
Moving the Reference betoken onto the lesser handle.
And so I'll right-click (Win) / Control-click (Mac) inside the Gratis Transform box and I'll choose Flip Vertical:

Choosing the Flip Vertical command.
Photoshop flips the copies vertically, again using the Reference Bespeak as the center of the transformation, creating a four-manner mirror reflection of the image. Press Enter (Win) / Return (Mac) to have it:
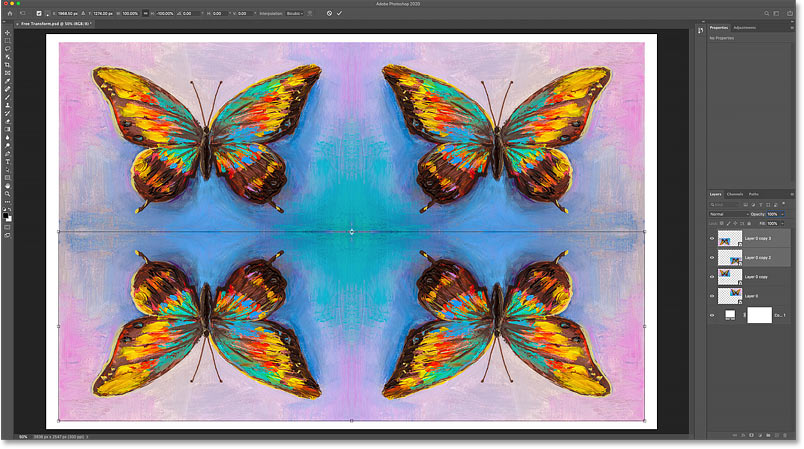
A four-way mirror reflection event created with Gratis Transform.
Where to go next
And in that location we have it! That's how to use the Gratuitous Transform command in Photoshop CC 2020!
In the next tutorial, I show you how to warp images using Photoshop's newly enhanced Warp tool!
Or check out our Photoshop Basics section for more than tutorials! And don't forget, this tutorial plus hundreds more are at present available to download every bit PDFs!
Other Stuff
© 2022 Photoshop Essentials.com.
For inspiration, not duplication.
Site design by Steve Patterson.
Photoshop is a trademark of Adobe Systems Inc.
Source: https://www.photoshopessentials.com/basics/transform-and-warp-images-with-free-transform-in-photoshop-cc-2019/
0 Response to "Photoshop Line Art So You Dont Go Outside the Lines"
Post a Comment